How to Use a Friction Testing Machine for Accurate Material Analysis?
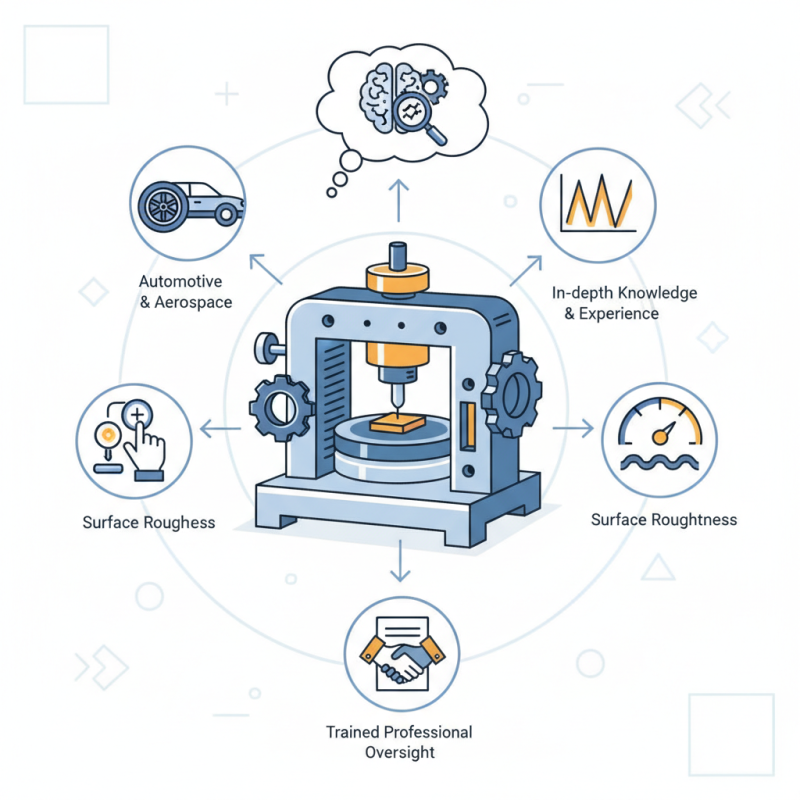
The friction testing machine is an essential tool for accurate material analysis. It evaluates various materials' frictional properties, providing valuable data for industries like automotive and aerospace. Proper use of this machine requires in-depth knowledge and experience. Without these elements, results may lead to incorrect conclusions.
The operation of a friction testing machine involves different parameters. Understanding how pressure, speed, and surface roughness affect friction is critical. Users must carefully select settings to obtain reliable results. Small mistakes can significantly alter outcomes.
Moreover, interpreting the results is not always straightforward. Errors in analyzing data can lead to misguided decisions. Therefore, having a trained professional oversee the process is crucial. This machine is powerful, but it demands attention to detail and expertise for accurate analysis.
Understanding the Basics of Friction Testing Machines
Friction testing machines are essential tools for material analysis. These devices measure the resistance between materials during sliding contact. Understanding how they work helps ensure accuracy in your results. This knowledge is not just theoretical; it comes from years of engineering practice and rigorous testing protocols.
When using a friction testing machine, it's crucial to calibrate the device properly. Calibration ensures your measurements are reliable. Pay attention to the surface condition of the materials being tested. Dirt or irregularities can skew results. Clean samples will yield better data.
Tips: Always document your testing conditions. Keep track of temperature and humidity, as they can impact friction readings. Regularly inspect your machine for wear and tear. An unmaintained device may lead to inconsistent results. You might find that slightly adjusting the testing speed alters outcomes, offering insights into material performance.
Remember, there's often an inherent variability in material properties. Testing multiple samples can provide more reliable averages. This can reduce the impact of anomalies. Experimentation and adjustment are part of the learning curve. Embrace the imperfections in your process; they can lead to valuable discoveries.
Selecting the Right Friction Testing Machine for Your Needs
Selecting the right friction testing machine is crucial for accurate material analysis. Understand your specific needs first. Are you testing polymers, metals, or rubber? Different materials require different testing approaches. Pay attention to machine specifications such as load capacity, speed, and testing environment. This choice will directly affect your results.
Consider the size and scale of your operations. For small laboratories, a compact machine might suffice. Larger facilities may need robust systems with additional features. Look for machines that offer versatility. A friction testing machine with adjustable parameters allows for a wider range of analysis. This saves you from investing in multiple devices for different tests.
Calibration is essential, as it impacts accuracy. Ensure the machine you select can be easily calibrated and maintained. Additionally, check for available support and resources. Instruction manuals and technical help can save time and frustration. Ultimately, the right friction testing machine can enhance your material analysis significantly. Yet, be prepared for some trial and error before finding the perfect fit.
Friction Testing Machine Material Analysis
This bar chart represents the coefficient of friction for different materials as tested by a friction testing machine. The data includes common materials used in various industries, allowing for a comparative analysis of their friction properties.
Preparing Materials for Friction Testing Procedures
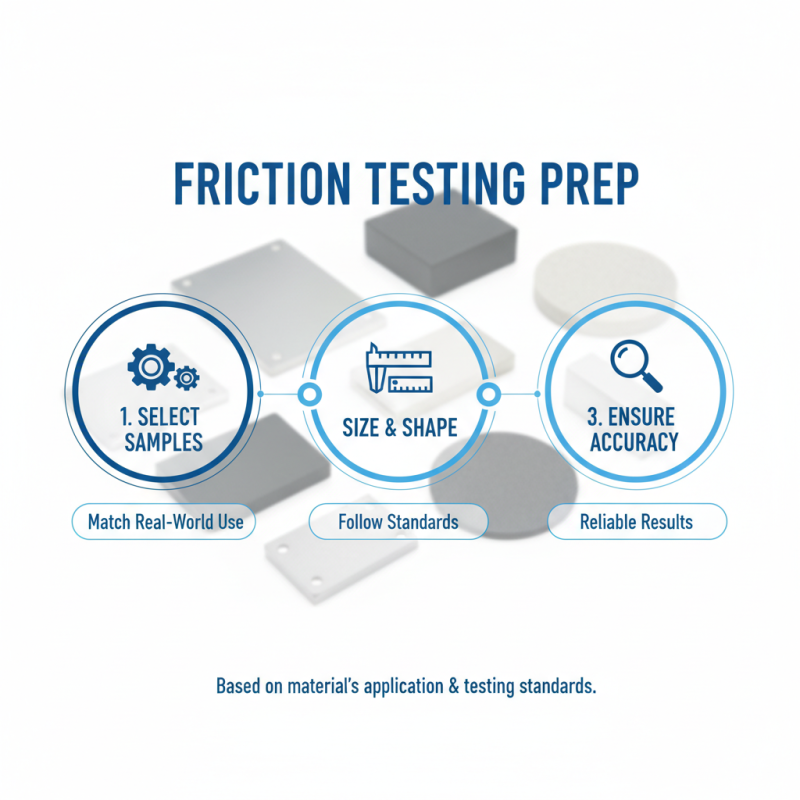
Preparing materials for friction testing is essential for obtaining reliable results. Start by selecting the proper samples based on the material's application. Each sample should mirror the real-world conditions the material will face. The size and shape of the samples matter greatly. They must fit the specifications set by the testing standards used.
Before testing, ensure samples are clean. Remove dust, oils, or any contaminants that might skew results. Proper cleaning methods include using solvents or simple mechanical brushing. After cleaning, it is wise to categorize samples based on their characteristics, such as hardness and surface texture. This step can be overlooked but is crucial for accurate comparisons.
Finally, consider environmental factors. The testing environment can affect friction readings. Temperature and humidity levels should be stable. Sudden changes can lead to unpredictable outcomes. Some might neglect these details, thinking they are minor. However, they can significantly alter the test's precision. Reflecting on these aspects will enhance your methodology.
Conducting Accurate Friction Tests: Step-by-Step Guide
Conducting accurate friction tests requires precision and attention to detail. Start by selecting the right materials for testing. Ensure the surface finishes are consistent. Clean the testing surfaces thoroughly to eliminate any contaminants. Use a calibrated friction testing machine for reliable data. This helps in achieving repeatable results across multiple tests.
After setup, apply the appropriate load to the test samples. This load must be uniform to ensure fair readings. Monitor the temperature during the test. High temperatures can alter material properties. Use a stopwatch to track the duration of the test accurately.
Record the friction coefficients meticulously. Take note of variations in results. These discrepancies might indicate underlying issues with either the machine or the sample. If results vary significantly, reassess your process. Understanding these factors helps improve future tests. Remember that consistent practice leads to better outcomes over time.
How to Use a Friction Testing Machine for Accurate Material Analysis?
| Test Method |
Material Type |
Surface Treatment |
Friction Coefficient |
Test Conditions |
| Static Friction Test |
Rubber |
None |
0.75 |
70% Humidity, 20°C |
| Dynamic Friction Test |
Steel |
Galvanized |
0.45 |
50% Humidity, 25°C |
| Pin-on-Disk Test |
Plastic |
Polymer Coating |
0.30 |
60% Humidity, 22°C |
| Incline Plan Test |
Wood |
Varnished |
0.55 |
55% Humidity, 21°C |
Interpreting Results and Ensuring Reliable Material Analysis
When using a friction testing machine, interpreting the results accurately is crucial for reliable materials analysis. Understanding the
coefficient of friction can help determine how materials will behave when in contact. A recent industry report highlighted that friction coefficients can vary significantly depending on surface conditions and material types. For instance, rubber against metal can show a coefficient range of
0.4 to 1.0, while plastics typically fall between 0.1 and 0.5.
Incorporating control measures during testing is essential. Small variations in the testing environment can lead to misleading results. Ensure your testing surfaces are clean and representative of real-world conditions. The temperature can also impact results; testing at consistent temperatures can mitigate discrepancies.
Tips: Calibrate the machine regularly. Document all settings and conditions during testing. Analyze multiple samples to ensure data reliability. Not all results will align perfectly; anomalies should prompt further investigation. Recognizing patterns in friction behavior can lead to improved material selection for specific applications.
Tracking these details enables a deeper understanding of material performance over time.